In this tutorial, we'll go over the steps to configure Language Tools, a new Anki Addon packed with language-learning functionality.
There are a few limitations in the add-on currently, you should be aware of them:
Language Tools is a paid add-on. It requires a monthly subscription due to its reliance on high quality paid resources such as Neural Text to Speech voices, translation services, etc. If you are a Patreon subscriber, or a trial user, you already have access to Language Tools, using the same API key. Subscribe, or sign up for the free trial.
Open the add-on page: https://ankiweb.net/shared/info/771677663 , you'll see the addon's code: 771677663. Open Anki, in menu, click , then Paste 771677663, click OK, then restart Anki.
After restarting Anki, go to menu , then . Enter the API key you obtained previously, then click OK. If everything goes well, it'll show that your API key is valid.
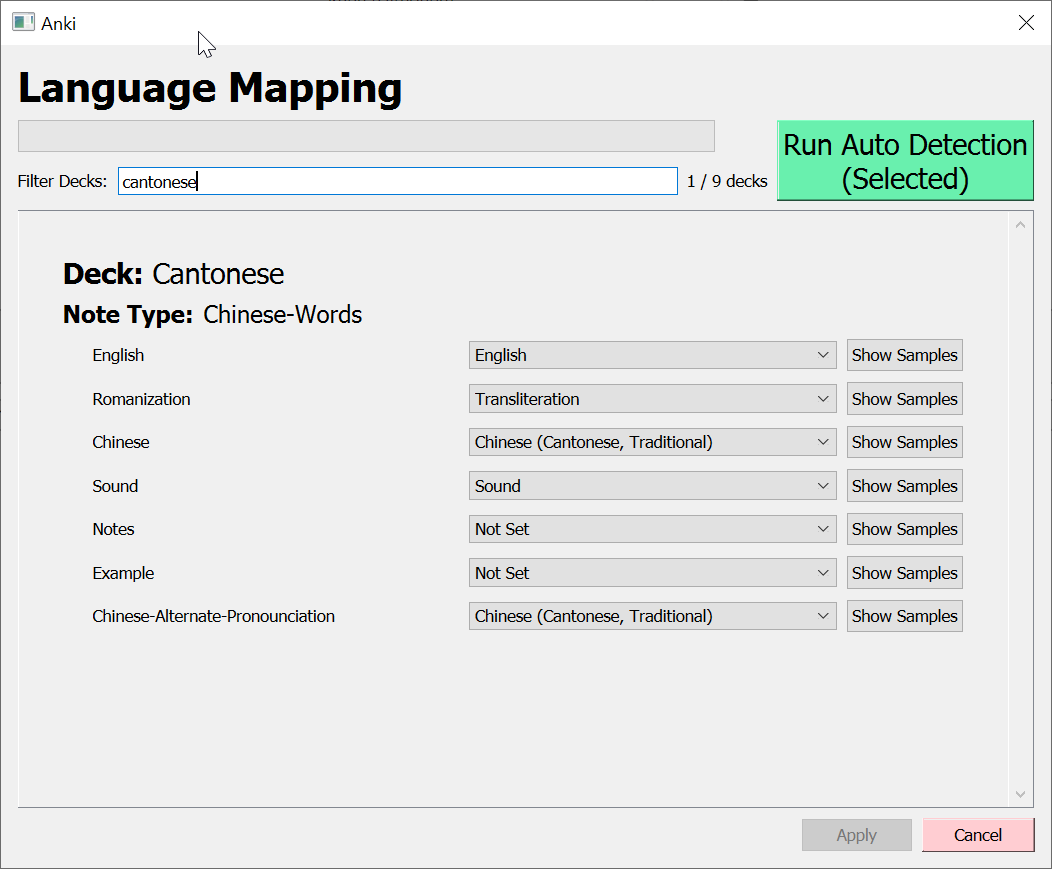
Now, we need to tell Language Tools what languages are contained in your decks and fields. Go to menu . You'll see the screen below. You can simply press Run Auto Detection, let the process finish (it make take a few minutes if you have a lot of decks). If the automatic language detection didn't correctly detect languages for certain fields, you can adjust those manually. When done, click .
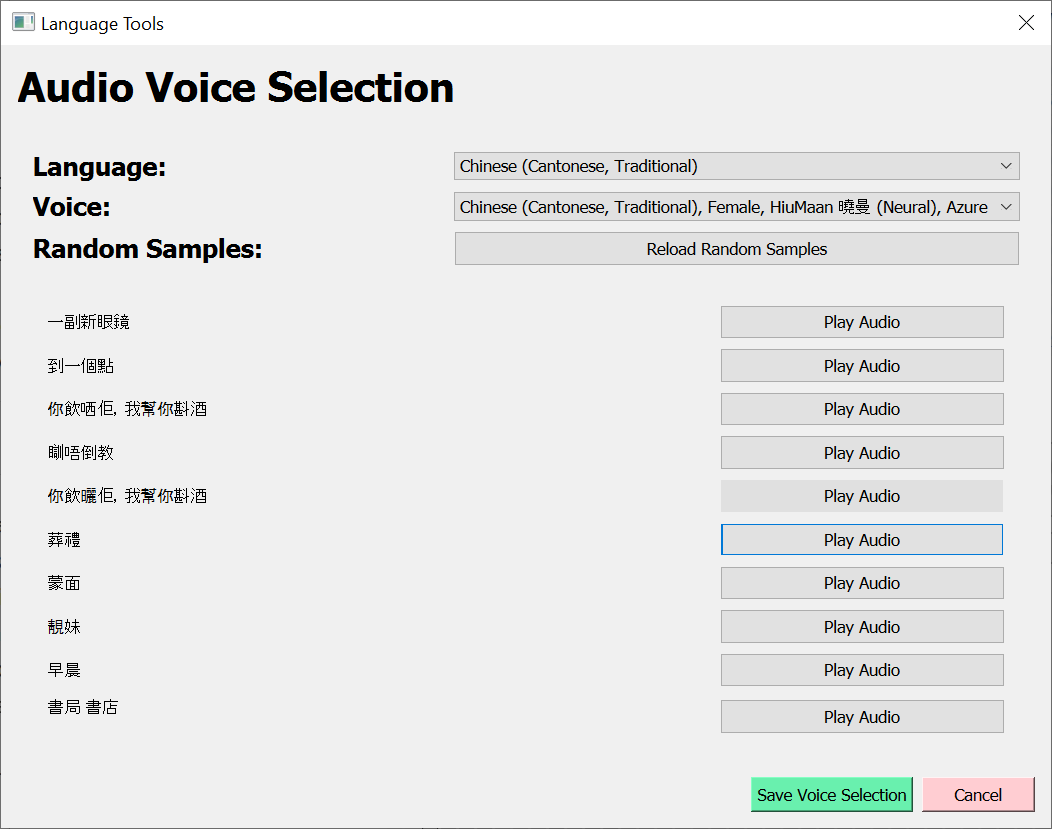
Next, go to menu . From there, you can select the audio voice you wish to use for a particular language. Language Tools currently only supports selecting one voice per language. You can sample the different voices by listing to audio samples drawn from your decks. Once done, press .
Now, we're going to add some automatic translation to your notes. Go to Anki's , then select a few notes from one of your decks. Go to menu , You'll the following dialog. Choose your , your (which will get overwritten), then select a . Click and you will see the translations appear. If you are satisfied with the translations (note you can double-click and edit them), you can click , and your deck will be updated with the translations. Note: once you've done that, Language Tools will remember that the English field should contain a translation from the Chinese field (in the example below). More on that later.
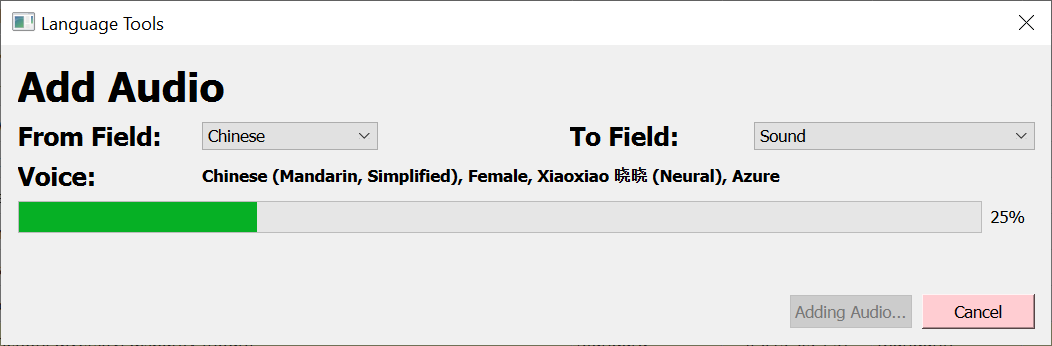
At step 5, we set up voices for each language. This will come in handy now. Still in the Anki browser, select some notes and go to menu ,
You'll see the following dialog. Note that you should dedicate a field to hold the audio tag, if you don't have one, you should add one to your note type. Select the , and the (which will contain only the audio tag). The language contained in the field, and the voice for that language were set previously. Click and the audio will be added to your cards, and this setting will be memorized.
After having mapped languages in your fields, and added audio and translations, you'll notice some buttons in the editor. The button allows you to pronounce any text, as long as you have a voice setup for that language. The button will appear for fields which have an audio tag, you can use it to verify that your audio was generated correctly. Finally, the allows you to choose another translation (it will show you a number of choices), if the current one is not good.
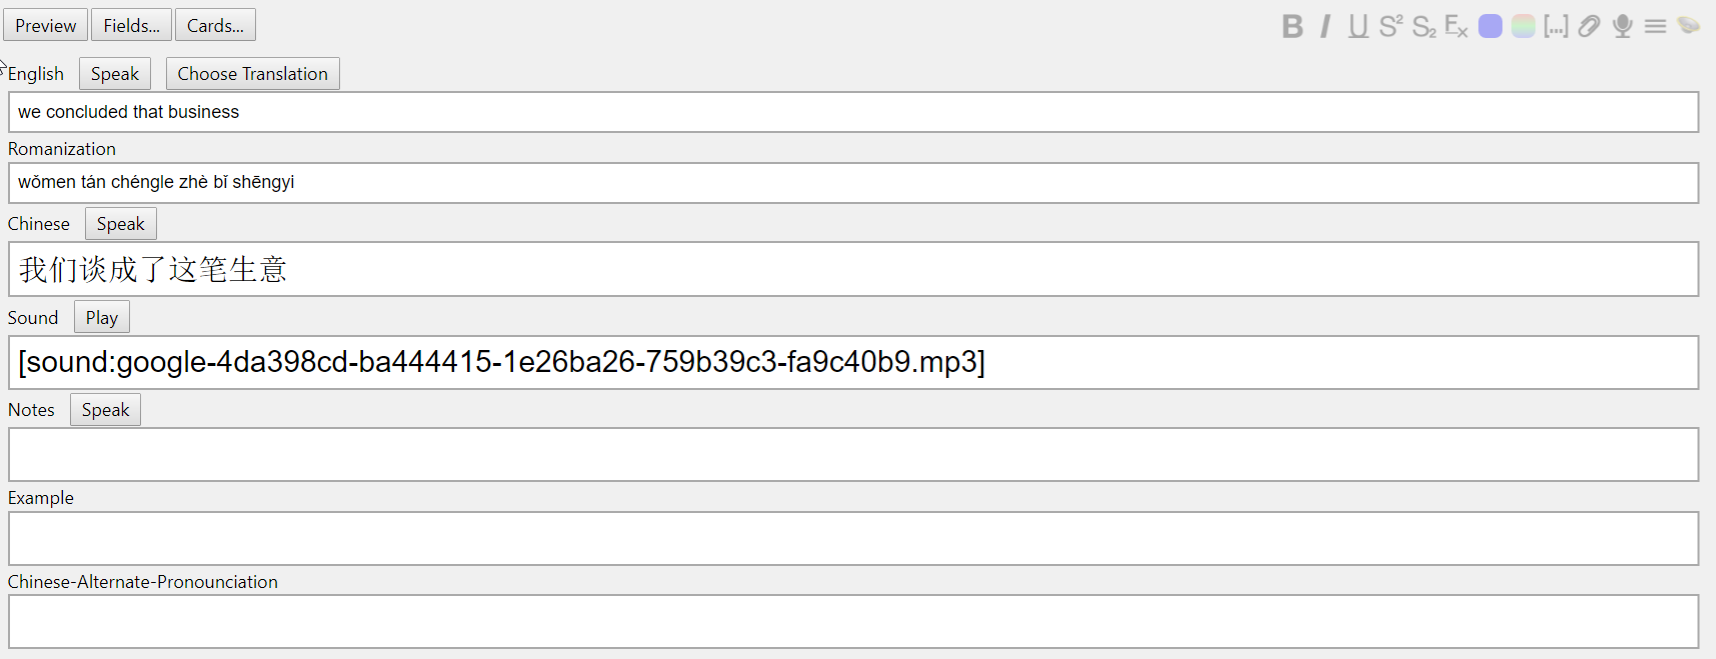
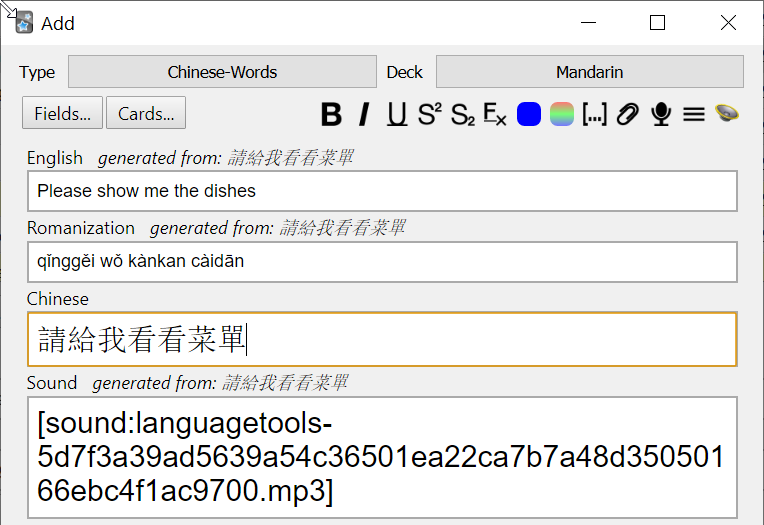
When you add audio, or you add translation or transliteration, Language Tools remembers those settings, and will run them automatically when you edit a note, or when you add a new one. This allows very easily adding new notes. Make sure the Note Type and Deck matches what you've configured previously. As you type in the Chinese field (which is the From field for Audio, Translation and Transliteration), the other fields will be generated automatically.
This is the end of the tutorial. If you have any questions, please email luc@vocab.ai. Are you interested in trying AwesomeTTS , HyperTTS or Language Tools, to easily add Audio / Translation / Transliteration to your flashcards ? Signup for AwesomeTTS Plus.